
I recently re-homed this Later Gotz Sasha doll Maria. I knew she had problems and thought I would try to return her to her original state. Maria had quite severe caving to her neck and body due to her stringing being too tight. This is the first time that I have attempted to re-string a later Gotz and I can tell you it is quite a tedious task, but well worth it.
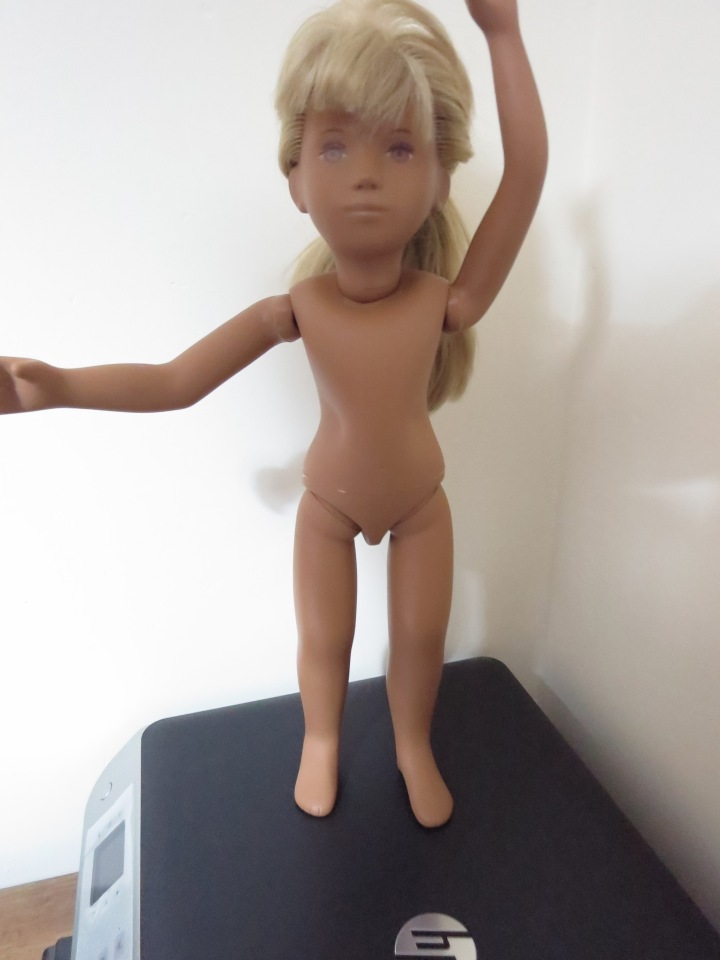
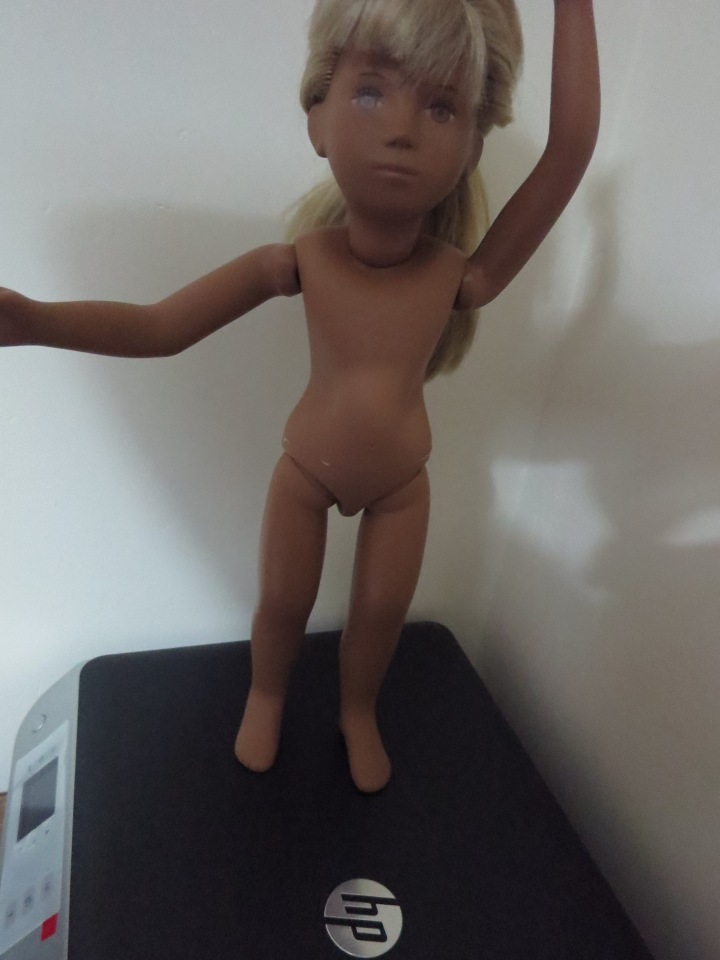
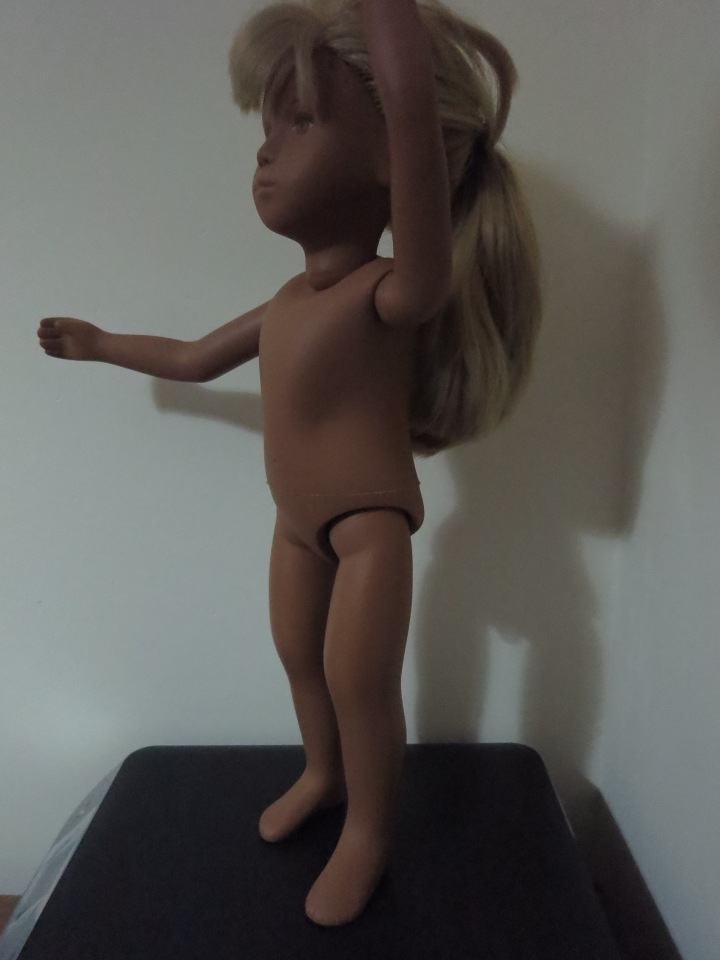
The photos above are of Maria when she first arrived and the ones below are how she looks now.


This is how I fixed Maria’s problems.
First of all I had to remove her stringing. The later Gotz dolls are strung using elastic stringing and plastic cups (as they are safer for children).
To remove the plastic cup from her leg to allow me to get to the stringing. I first heated the top of her leg with a hairdryer on full heat for a couple of minutes, to soften the vinyl.
Next I took hold of my trusty old button hook to encourage the plastic from the leg hole, once I could see the edge of the plastic cup I used forceps to pull it free from the leg hole.
Once the plastic cup was out, I could see that the stringing went through a hole in the middle of the cup and was then secured with a tight knot. I held the stringing out of the body hole with the aid of a pair of forceps and then used my button hook and a smaller pair of forceps to undo the tight knot.


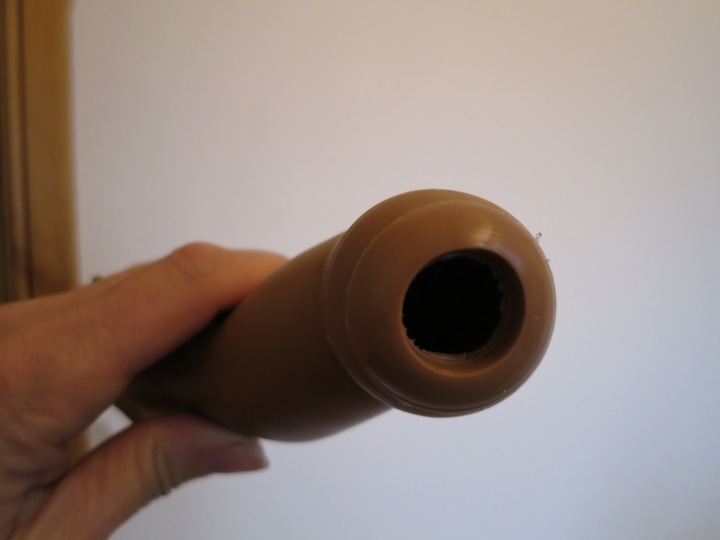
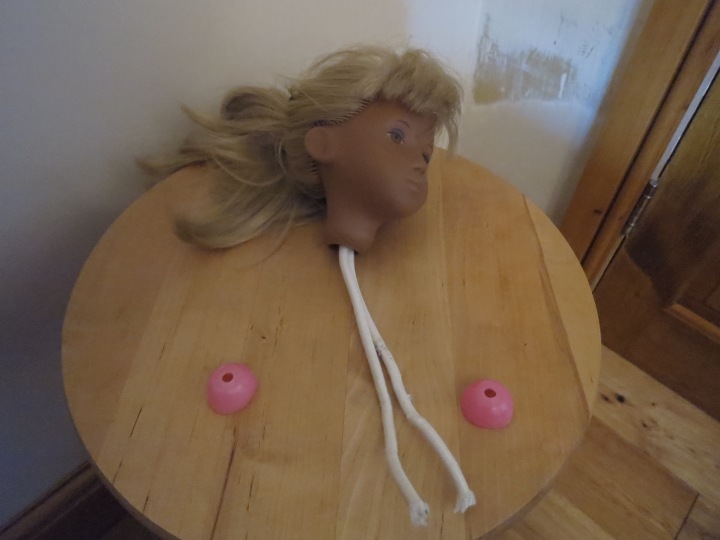
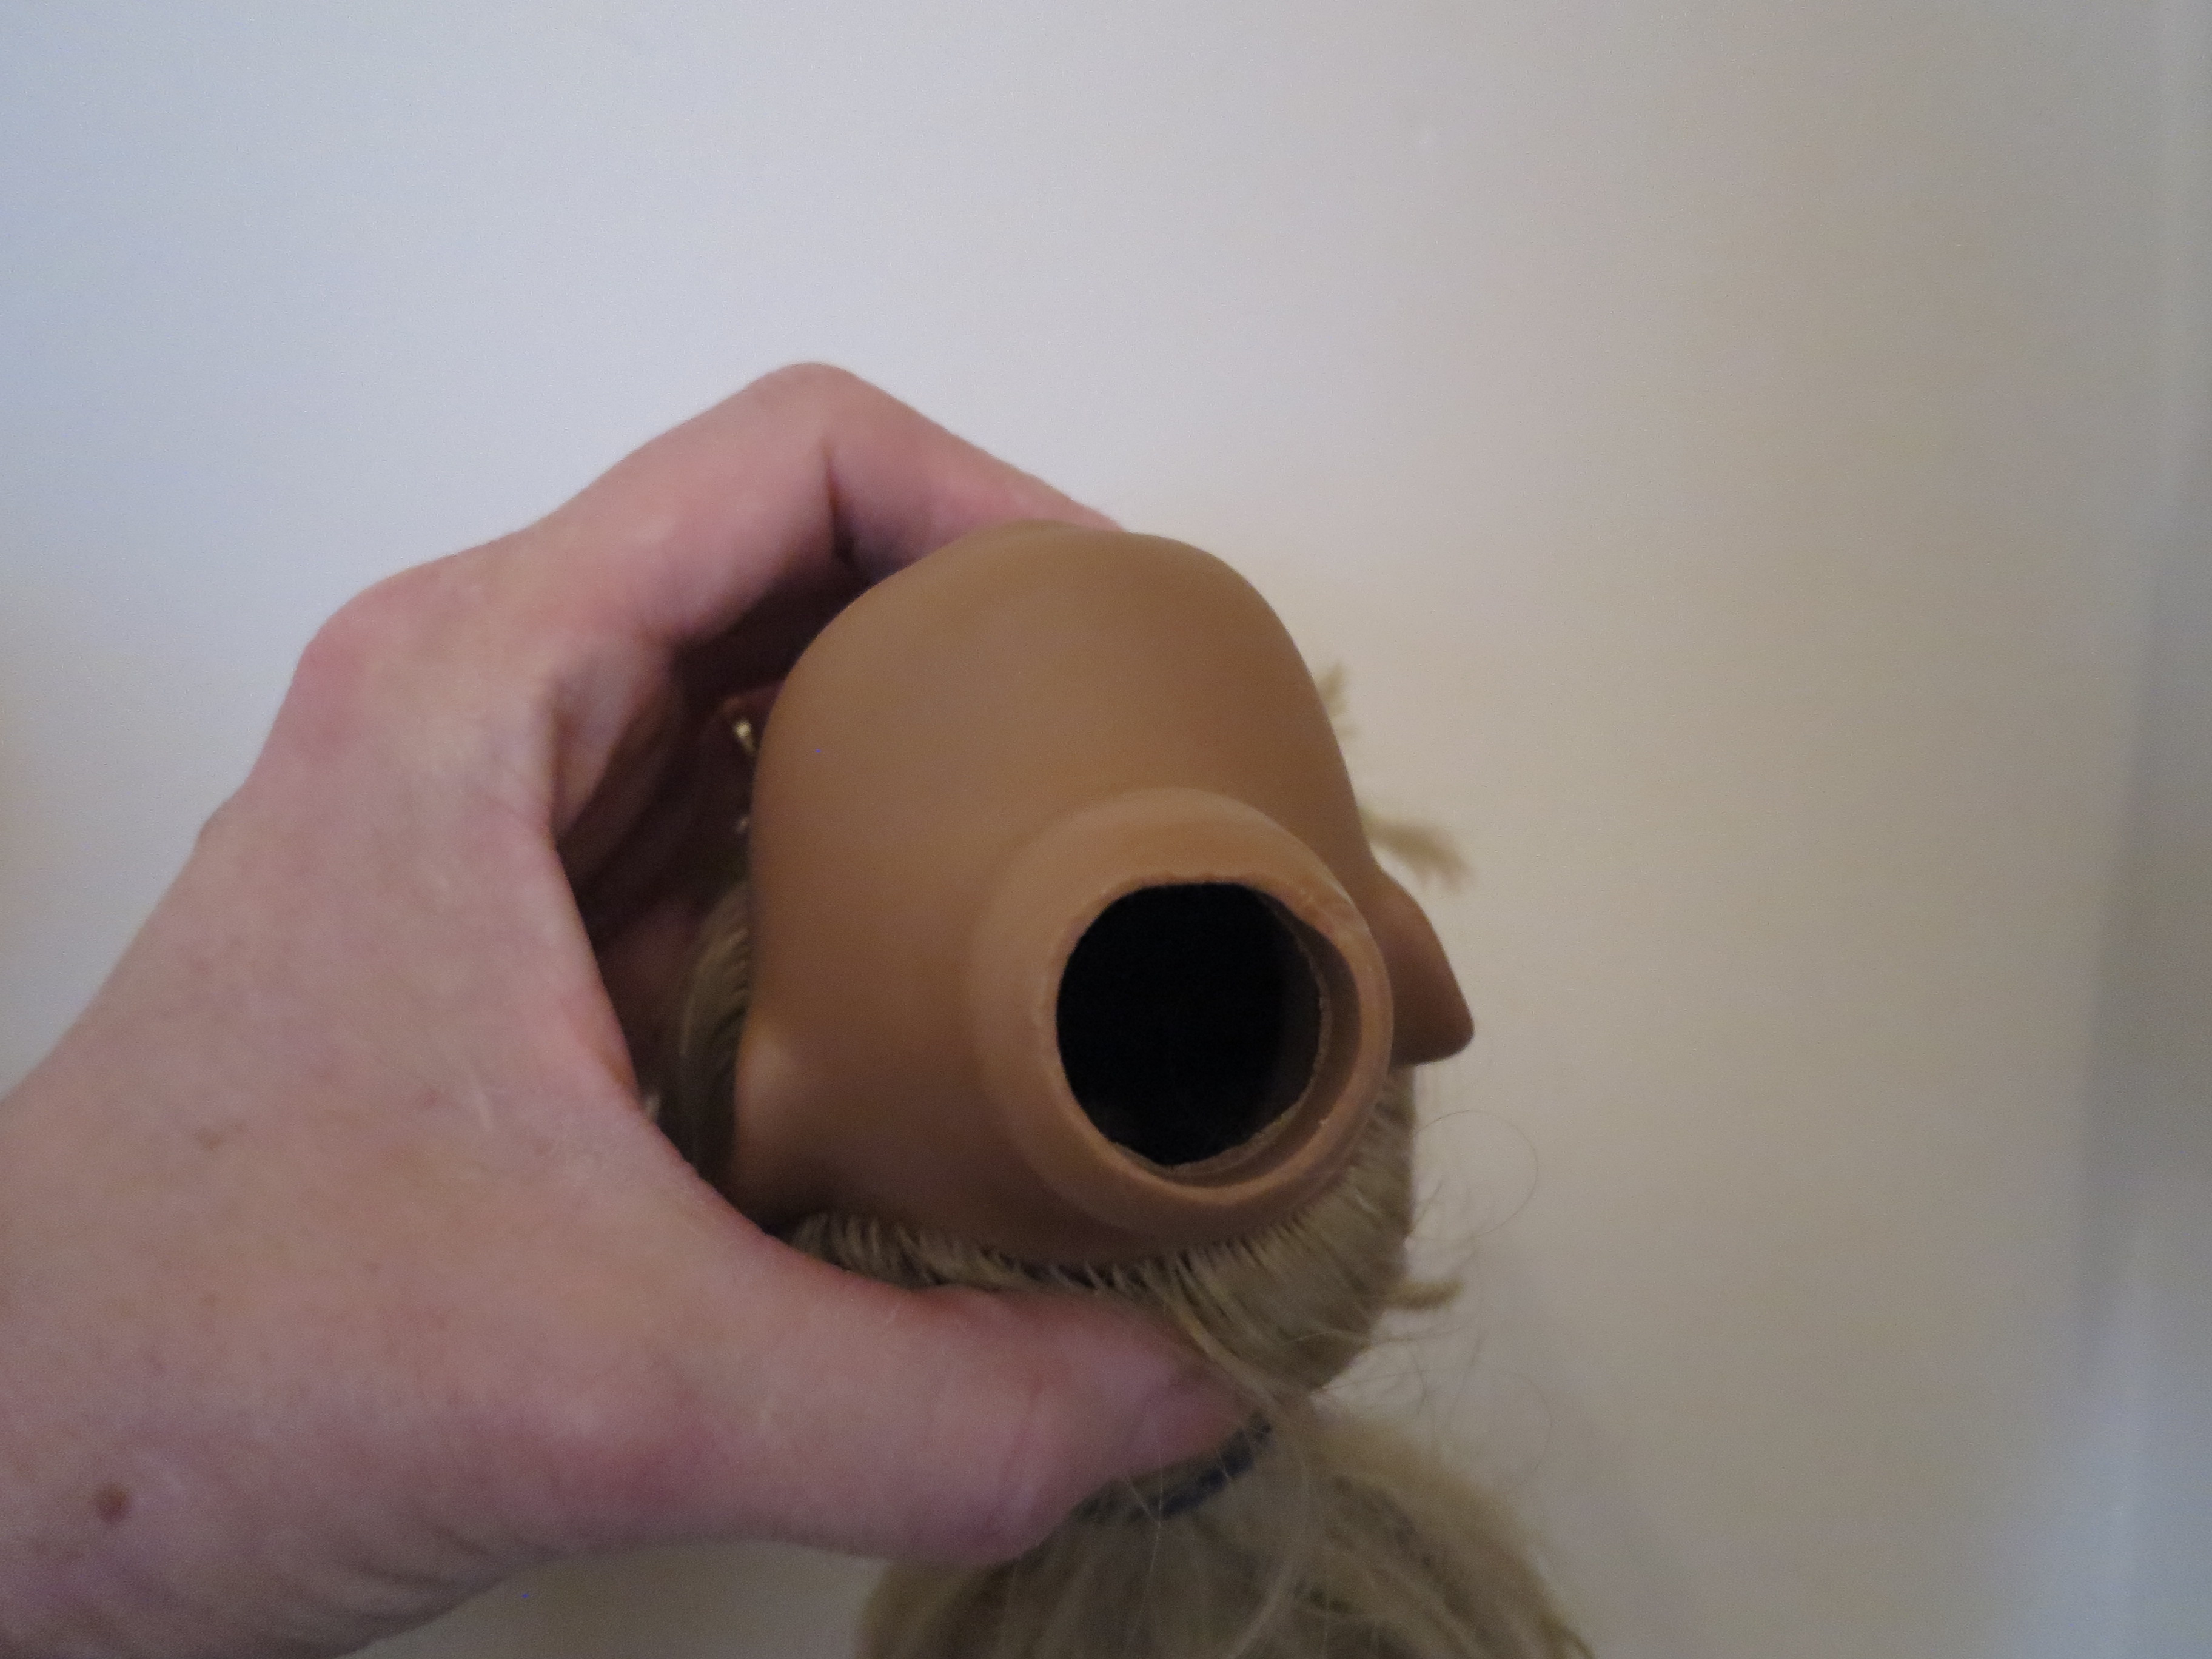
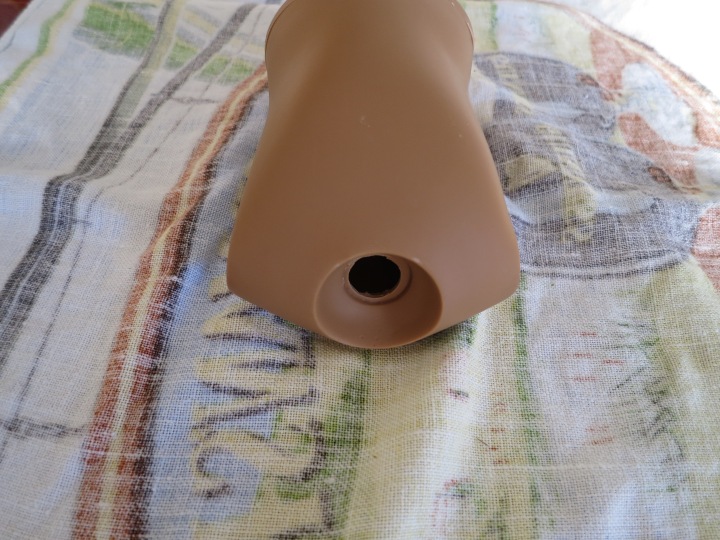
Once the knot was undone I could then slide off the pink plastic cup. I repeated the same process to the other leg. I had discovered that I would have to give Maria new stringing and to get to the head stringing the pink plastic cups had to be removed as they would not fit through the neck opening.
Inside the neck the stringing looks similar to the later English Trendon Sasha dolls, but it is not.

To get the white plastic cup and stringing out of the head, I used the same process of heating the neck opening with a hairdryer. To remove the plastic cup I also used my button hook and forceps.

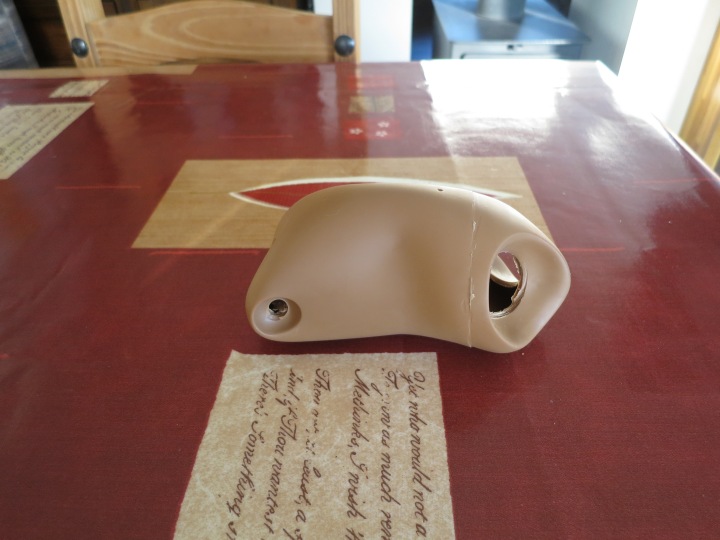
The hole on the head opening is much wider than other types of Sasha dolls and Marias was warped due to the caving.
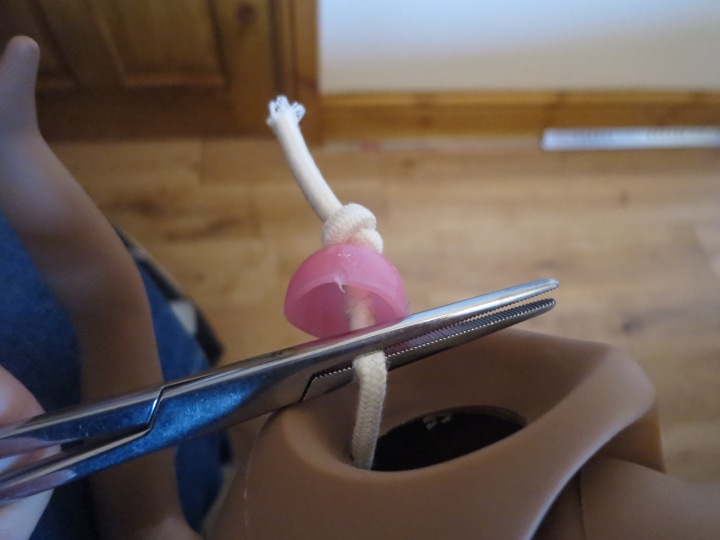
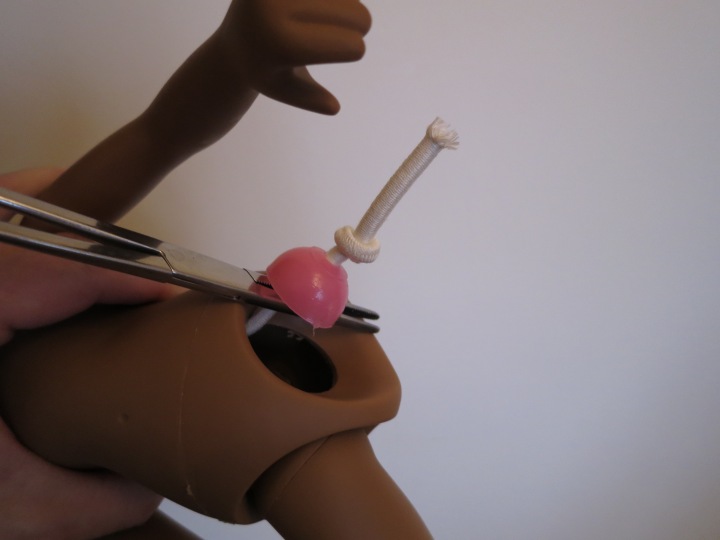
Once I had removed the white plastic cup and stringing from the head, I could see that there was one piece of stringing running through the white plastic cup, which was doubled over and then secured with a small piece of stringing which was tied in a knot. ( I much prefer the English Trendon way of stringing Sasha dolls.)

I had now reached the stage where I had her legs and head off. I tried heating her torso using the hairdryer method to try to correct the caving to her body. The hairdryer method did not work, so my only option now was to remove her arm stringing, so that I could boil her body back into shape.
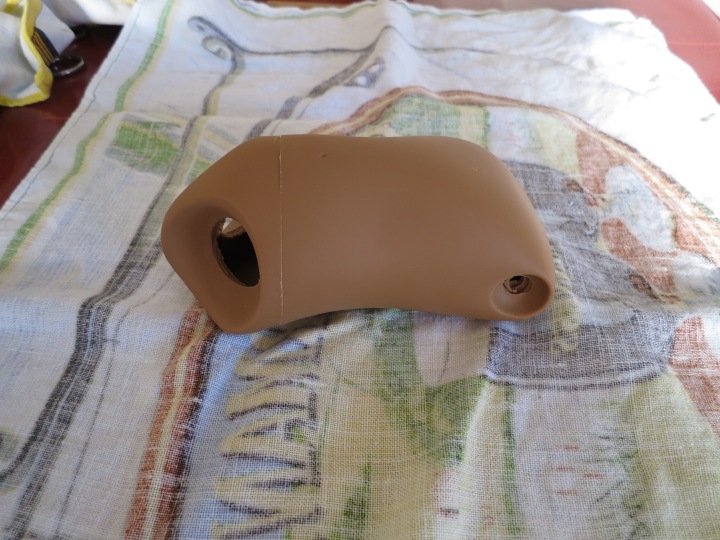
So once again I heated her arm hole with a hairdryer and used my button hook and forceps to remover her arm stringing and white plastic cup. To say the arm stringing was stubborn to remove was an understatement.


Once I had the stringing and plastic cup out I could see that a brass sleeve insert had been crimped onto the arm stringing to make it more secure. The only way forward now was to cut the stringing to release it from the body.
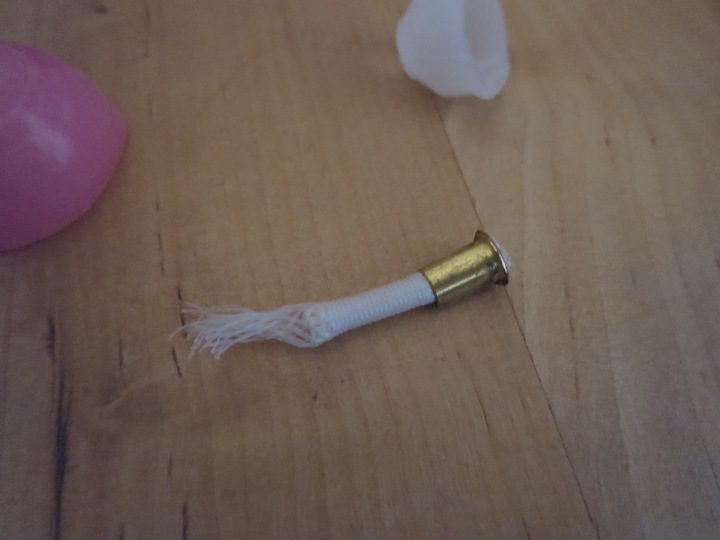
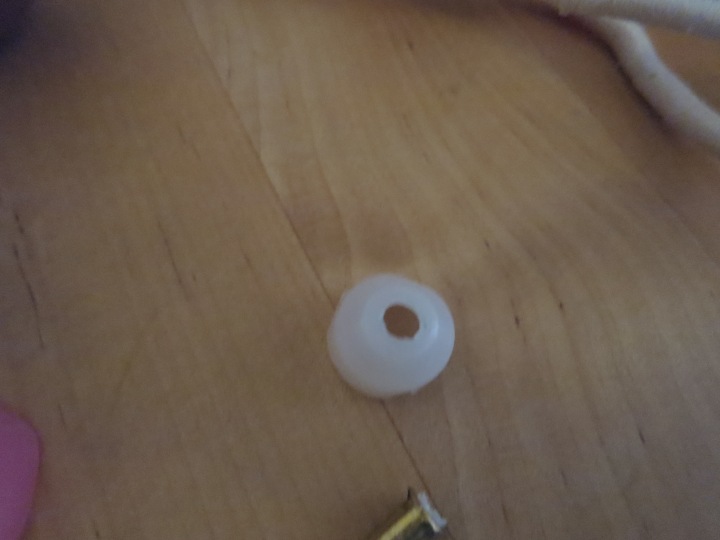
Incidentally the white plastic cups used for the stringing to the head and legs are the same size. The plastic cups in the arms is naturally much smaller.
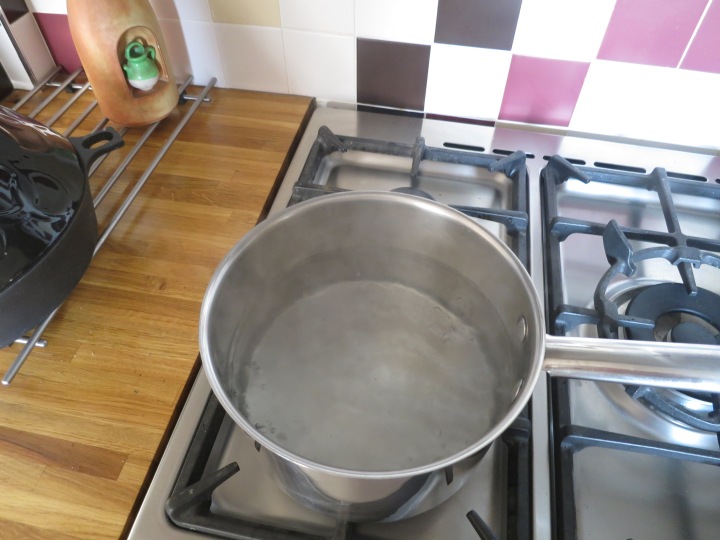
I prepared a saucepan of simmering boiled water.
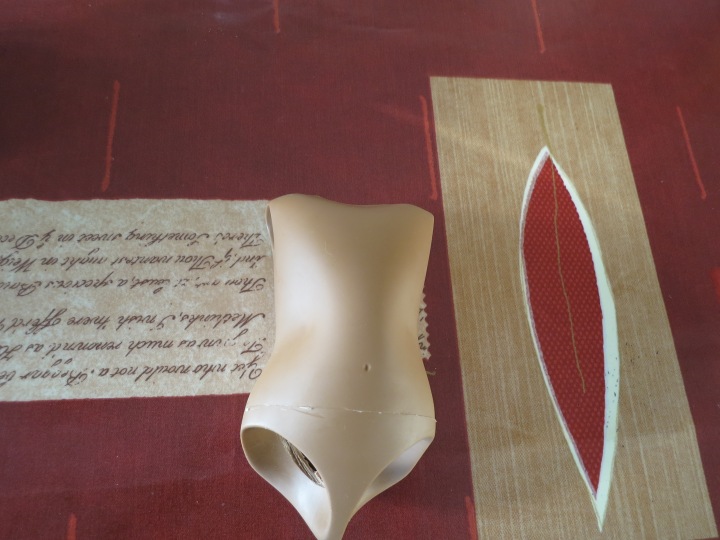
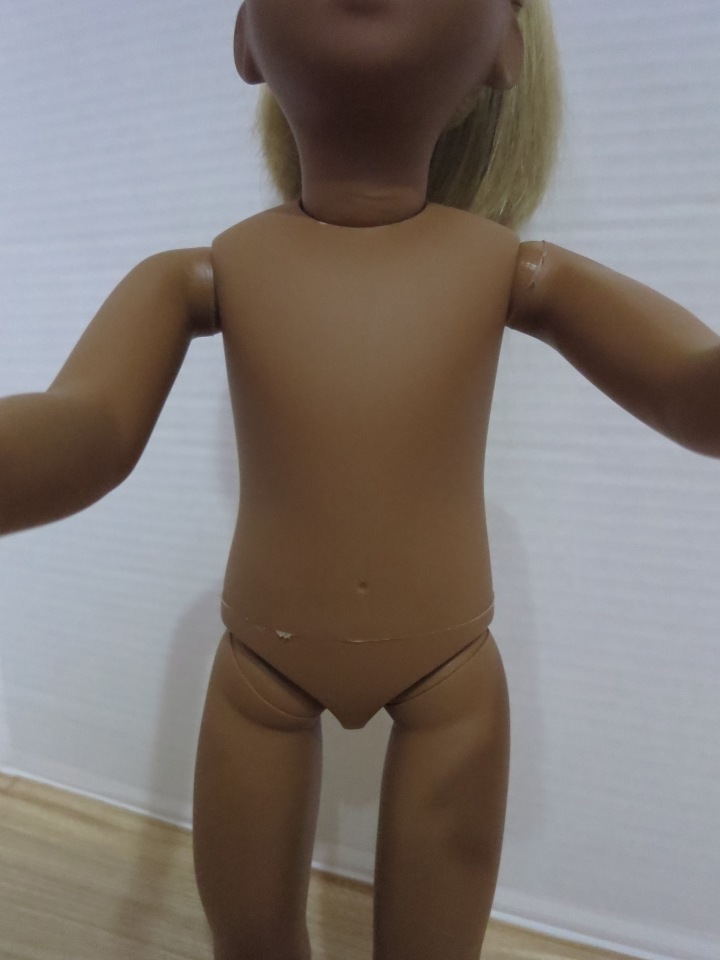
Her are some photos of Maria’s torso before I boiled it, to give you some idea of the degree of caving and warping her body had.


I carefully placed Maria’s torso into the simmering water for 5 minutes. I was careful to place her torsointo the water using a tool with no sharp edges to it, because when the vinyl is softened using something sharp could damage the vinyl in its softened state. I also had a tea towel ready to use to let the torso dry out on.

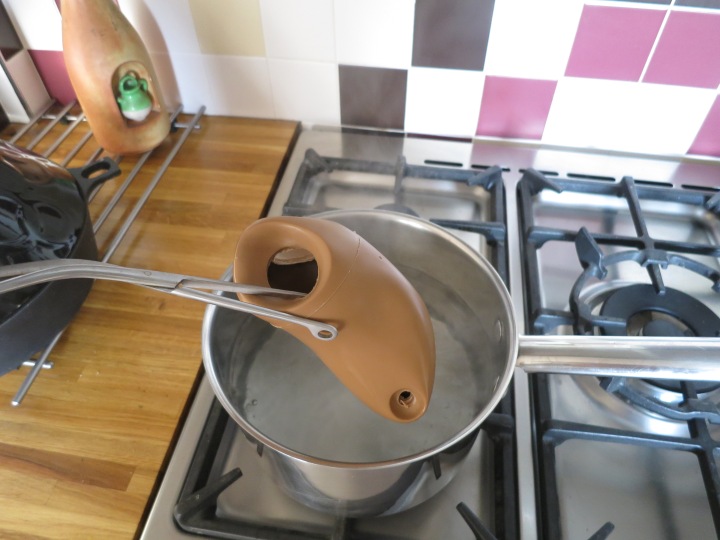

As Maria’s neck was also quite warped, I double bagged her head in two strong freezer bags and held her head over the pan with the neck hole just into, the simmering water for 2 minutes.
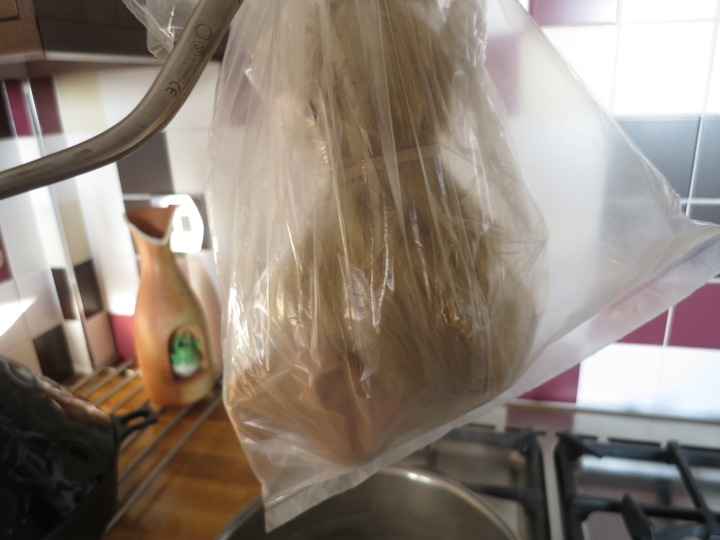

I took Maria’s head out of the plastic bags as soon as possible ,after removing her head from the simmering water. The results were great and her neck hole and body were reshaped back to normal. I left the body parts on the tea towel for about half an hour to let the vinyl cool and re- harden.


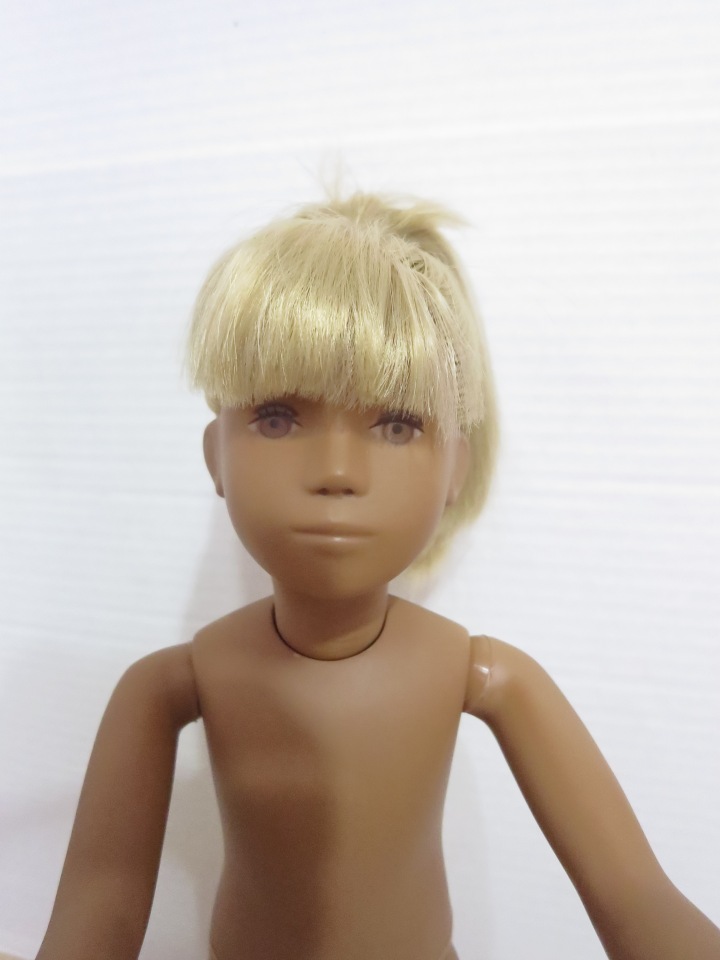
Next I decide to give Maria’s hair a good wash and condition I used Elvives’s hair repair shampoo and conditioner.

I let her hair dry naturally and placed a rolled up sock on her head to keep her fringe in place.
Now then back to the dreaded re-stringing. The leg to head was not a problem I used new stringing about an inch an a half longer on each leg, to stop any further neck and body caving. The arms were a headache . In the USA I believe you are able to purchase the brass insert sleeves to use for crimping on the arm stringing, however in England they have now been replaced with plastic ones, which are useless for crimping, luckily some time ago I had purchased some arm hooks, which I used to re-string the arms the English Trendon way.

I heated the arm hole for a couple of minutes, inserted the arm hook, using forceps to hold the hook in place on one arm, added the stringing to the hook and then used my button hook to pull the stringing through the body keeping the arm stringing behind the body stringing and connecting it to the arm hook on the other arm.
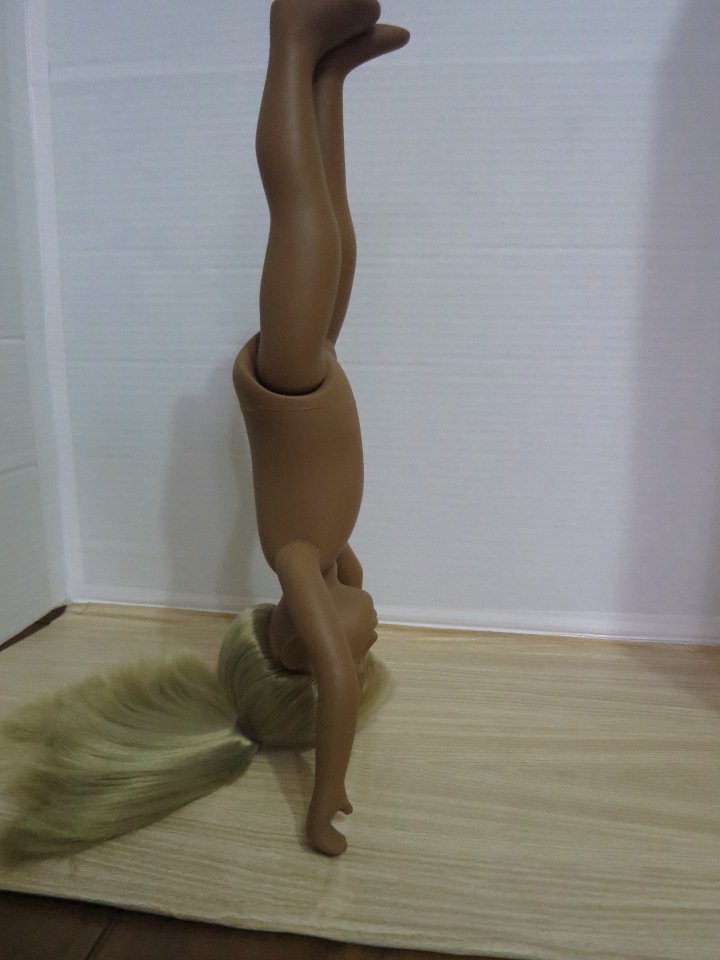
Maria was so happy she stood on her head.
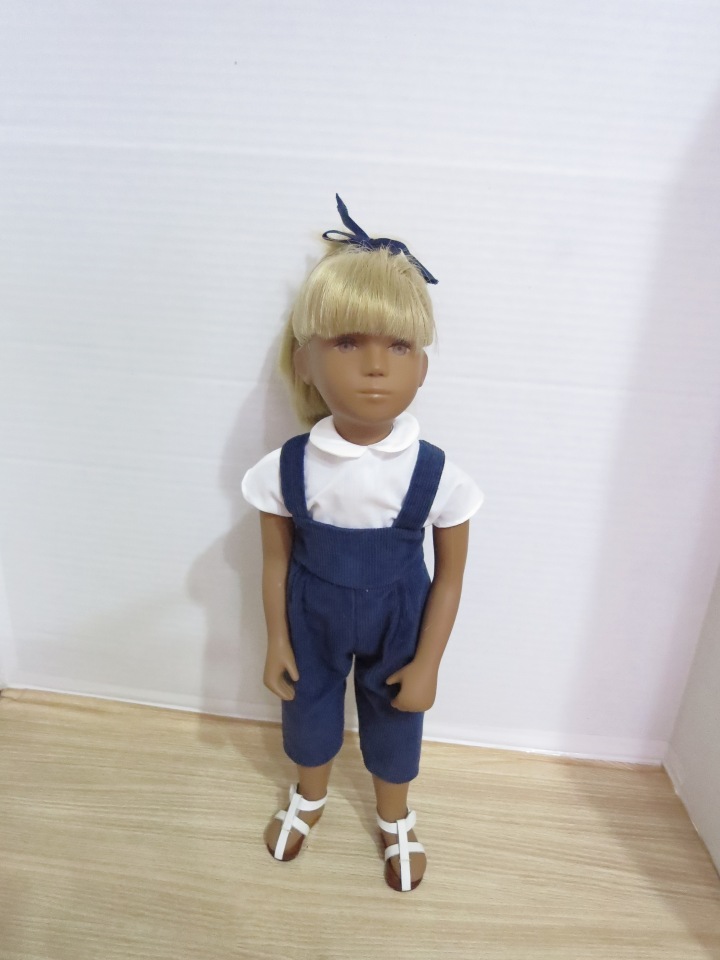
I had given her clothes a good wash and hey presto she was ready to go.

I hope you have enjoyed this post. I am not an expert I am just sharing my Sasha adventures with you and I hope you have enjoyed this post. I am over the moon to have Maria as part of my Sasha family, thanks for reading this.

wow, what a project! You are very brave!! I always associate that appearance on the body as a too-tight doll stand, but you think it was too-tight stringing? Makes me want to check my later Gotz dolls! Yikes! Great job on her, she’s (now) gorgeous!!
LikeLike
Hi Marti yes, it was definitely the stringing being too tight. I have seen lots of Gotz Gregors like this. The doll stand can mark the body, but tight stringing causes neck caving and the body to warp.
LikeLike
Brilliant do over Theresa, and as Marti said, very brave with these later dolls having a different ‘set up’ to the others. I bet she is much happier now.
LikeLike
Thanks Lorraine it was an experience
LikeLike
Who’s a very clever girl then!
LikeLiked by 1 person
Thanks Kendal. I must say that I much prefer the engineering of the earlier Sasha dolls in the stringing department. If this is progress, I find the plastic cups, cheaply made and tacky x
LikeLiked by 1 person
I had to restring one leg of a gotz toddler and that was enough for me, those plastic cups are awful.
Maria looks great now, a great job Theresa
LikeLike
Thanks Tricia its a pity the neck hole on the later Gotz is too big for a neck ring otherwise I would have re-strung her completely the English way it is so much easier x
LikeLike
Thank you so much for the tutorial! I do have a Maria in similar condition and should do something about it, but I have restrung only Trendon Sashas since. This gives me more confidence.
She is such a lovely girl, and she looks very relieved now you cured her.
LikeLike
Thank you Ursula I am sure you will do a great job and if you need any help let me know.
LikeLike
Thank you for taking the trouble to give such clear directions and photos showing how you fixed Maria’s collapsed chest and neck. It is a shame that the dolls were not checked at the factory for “too-tight” stringing, as this condition is usually factory caused!. I will keep your excellent tutorial for reference, and I agree it would be great just to restring as the English dolls were strung! SusanLk
LikeLiked by 1 person
Thanks Susan
LikeLike
Well done!
And she was worth it, definitely. She’s got such a lovely expression!
LikeLike
Thank you I think she is lovely Too
LikeLike
Fantastic repair Theresa and such a project too! I have’n tried to restring a new Gotz Sasha before, what a faff! Your Maria looks just perfect now.
LikeLike
Thanks Janet. You can’t beat the English Trendon way of doing things x
LikeLiked by 1 person
Yes, I don’t know why the newer ones weren’t done using that method.
LikeLike
You did an amazing job restoring your dolls, Theresa. You made it look easy but I know it was a lot of work. You are very talented! Thank you for sharing your Sasha adventures.
LikeLiked by 1 person
hi Joni a lot of it is trial an error, thank you for your lovely comments x
LikeLike
Hello there! Dropping by to thank *so* very much for this, as I’ve been brave and followed what you did so I can wash and spruce up my new-to-me late 70s Sasha waif! I even felt brave enough to use my hairdryer to help reform a deformed arm socket (combo of too tight stringing and possibly the way it had been lying over time?)–coming from someone who’s never done anything like this before, I felt like you were at my shoulder supporting me, and I feel empowered to try rerooting now!
Big hugs! Hazel
LikeLike
hi Hazel, I am thrilled I was able to help, if you ever need anymore help let me know I will be happy to help.
LikeLike
Can you help me find a new neck ring? I’ve had Sasha since 1970, we’ve been on many adventures and she has been restrung accordingly! The last time her neck ring broke and I am afraid to send her off to be repaired. If you can direct me to any helpful websites, I would be very grateful.
Thank You
LikeLike
Hi Jenny i have sent you an email
LikeLike
Hi Jenny i sent you an email a few days ago.
LikeLike
Thanks for this fabulous tutorial, Theresa.
LikeLike
Glad you enjoyed it
LikeLike